


Troubleshooting Aspire Bulk Import Tool Errors
Overview
Course managers with Owner or License Manager permissions can roster participants in Lexia Aspire® Professional Learning using the Bulk Import Tool.
This article explains how to resolve Bulk Import errors. This will ensure that all participants are successfully rostered.
Applies to: Course managers who have Owner or License Manager permissions for Lexia Aspire® Professional Learning.
Does not apply to: Course managers who have Cohort Manager or View Only permissions or educators who are participants of Lexia Aspire® Professional Learning.
Import Preview
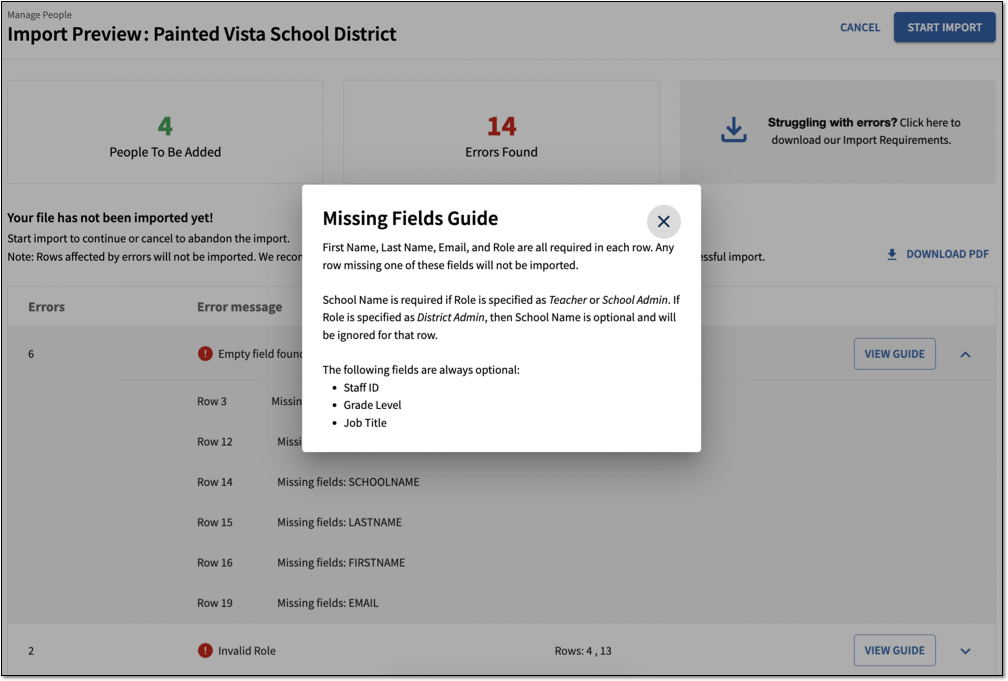
When you upload your completed Lexia Staff Import Template, you can review any errors in the Import Preview before proceeding.
If your import contains errors, the Import Preview shows:
How many people will be added (or updated)
How many errors were found
The Errors Table listing error messages, rows affected, and guides for fixing each error
A Download PDF link, to view and save the contents of the Errors Table
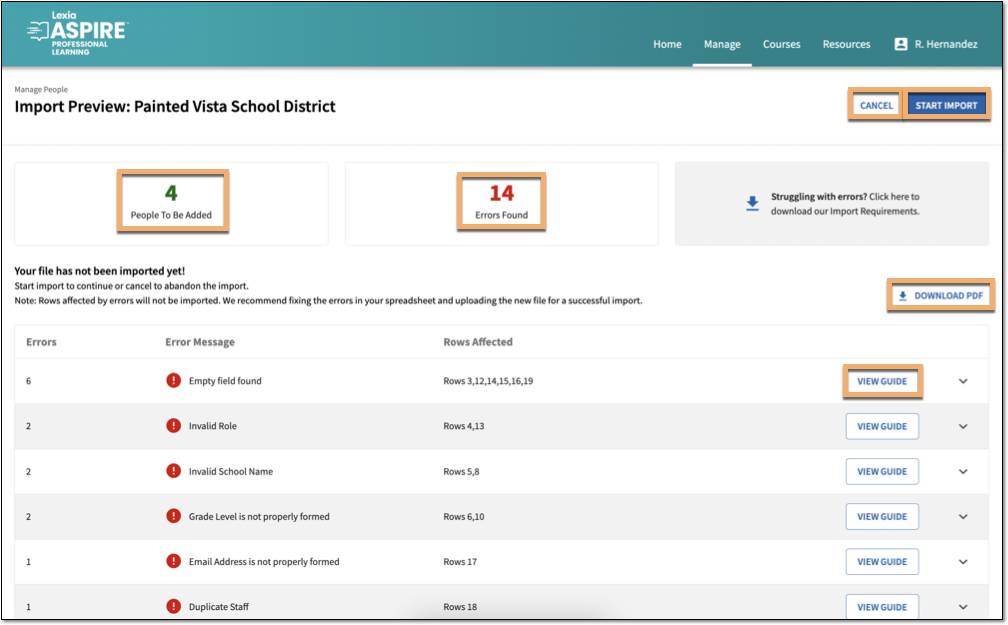
Rows affected by errors will not be imported.
To resolve errors before importing, select Cancel. Resolve the errors in your template and start the Bulk Import process from the beginning.
If you choose to proceed with the import, select Start Import. This will import only the rows that do not contain errors. In order to import all rows, you will need to resolve the errors and upload the template again.
Resolving errors in your template
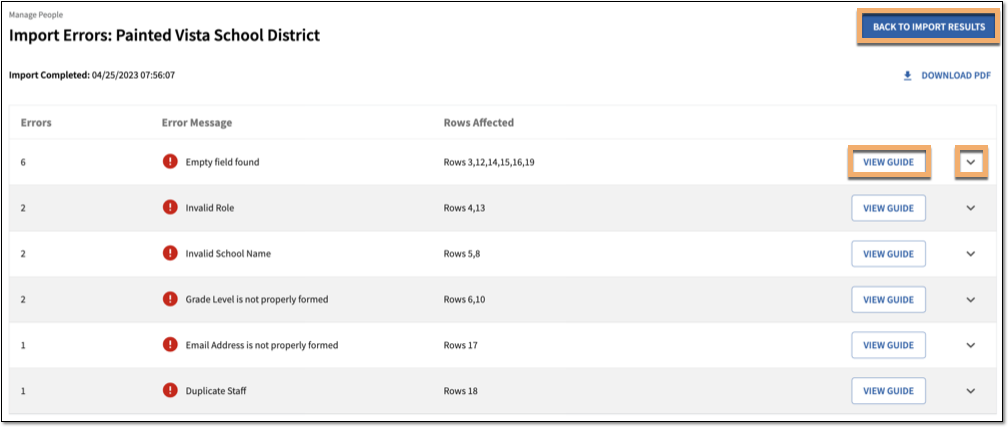
Select the dropdown arrow on a row of the Errors Table to display the details.
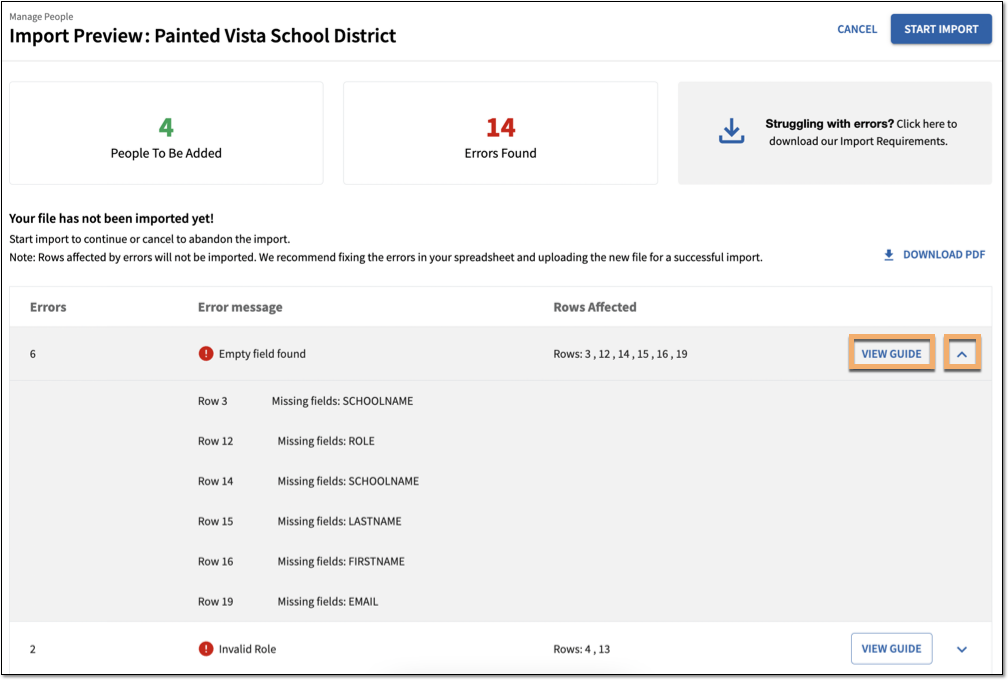
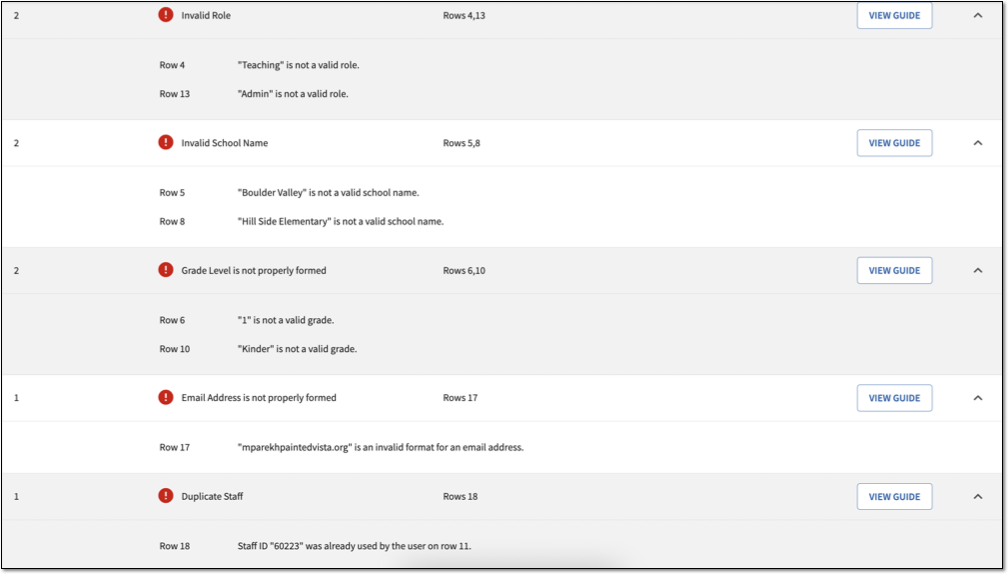
Select View Guide. This explains the requirements for fixing the associated error.
Open your template and resolve the errors in the affected rows.
See Aspire Bulk Import Error Examples for more information on what errors you may encounter.
Import the updated template to the Aspire platform.
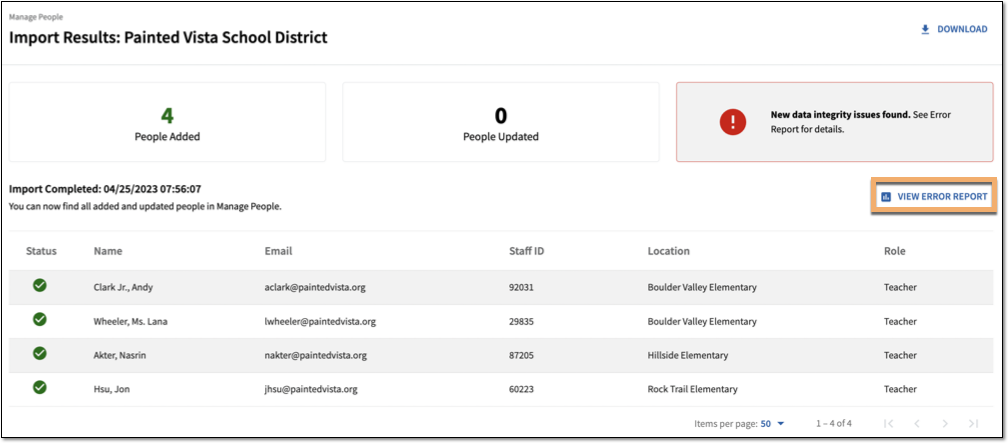
Addressing errors after the import
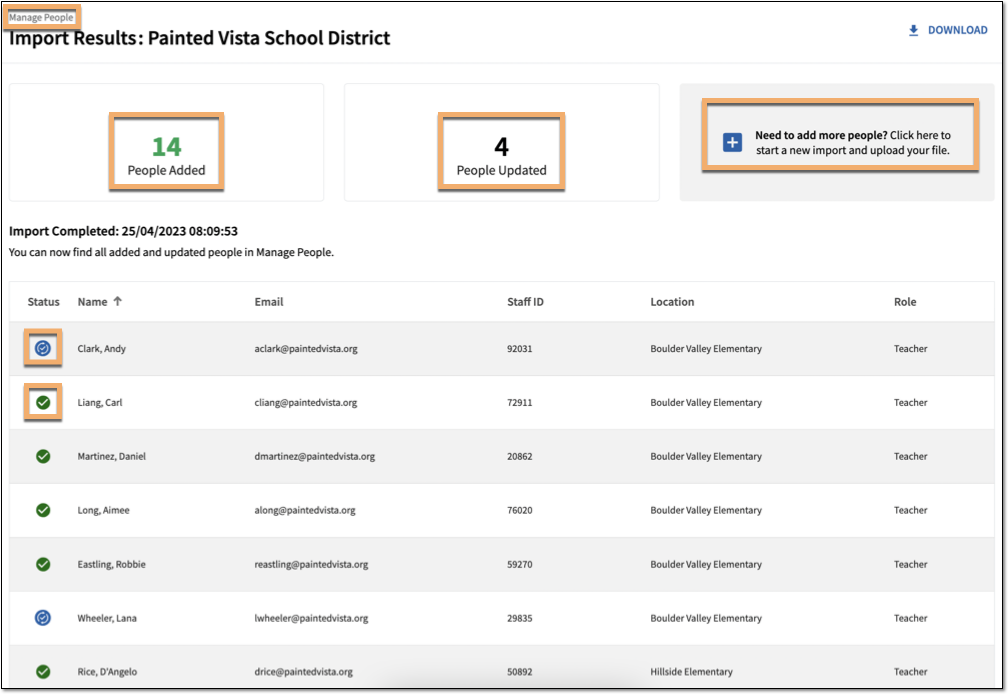
If there are errors after the import is complete, the Import Results page contains a link to View Error Report. Select this to view the Import Errors page, which displays the Errors Table.
After you resolve the errors in your template, start a new Bulk Import.
You can import a template that contains rows that have already been imported into the platform. This updates the participant information in the platform. It does not create duplicate participants.
When the import is complete, view the Import Results page. Added rows display a Green Checkmark. Updated rows display a Blue Checkmark with Rotating Arrows. From this page, you can start a new import, or return to Manage People or the License Set.