Microphone Setup and Configuration for Lexia English
Overview
When students use Lexia English for the first time on a device, they will need to grant access to the microphone. This article describes how to set up microphone access for Lexia English on a web browser and on an iPad. Before getting started, check with your tech staff to see if access to the microphone is a managed setting.
Applies to: Educators and Caregivers who help students log in to Lexia® English Language Development®.
Bluetooth headsets and earbuds are not supported.
Before you begin:
Before your students access Lexia English for the first time, verify that their user permissions allow them to grant microphone access to their browsers or devices.
You may want to check with your tech staff ahead of time to see if access to the microphone is a managed setting.
You can also test logging in to Lexia English on a student device yourself, to see if you are able to grant microphone access as described below. Make sure you are logged in to the device as a student and not with your own (staff) credentials.
Each time your students use Lexia English, after the device has turned on, have them plug the headset or earbuds into their device before they log in to the device. This increases the probability that the device will recognize the headset or earbuds as the default listening and speaking device.
If you run into any issues as you set up, check with your school IT Specialist, as your school and/or district may have different device management settings and configurations.
For best results:
Reduced background noise
Ensure that students have adequate space between them.
Ensure that students are not seated near something (or someone!) that makes excessive noise.
Demonstrate microphone position and speaking volume
If students use a headset, show them how to position the microphone so that it is about two finger widths from the corner of their mouth.
If students use earbuds with an inline mic, remind them not to touch the inline mic while they are working in a speaking activity.
Have the students speak at the volume they would if they wanted to be heard by someone sitting near them. They don’t need to shout for the Speech Recognition Engine to understand them, but they should speak loudly enough to be heard.
Additionally, you can navigate to the Student Info button (the student avatar icon) to verify the correct headphone set has been selected.
First time setup - allow microphone access
First time using Lexia English on a web browser
Explain to your students that the first time they launch Lexia English on a web browser, they should see a notification that “english.lexialearning.com wants to use your microphone”, and that they should choose Allow.
Are you a Chrome administrator for your school or district? You may be able to add english.lexialearning.com to the "Audio input allowed URLs" configuration in the Google Admin console. This may prevent students from having to allow microphone access the first time they log in.
When they have granted access to the microphone, they should see a microphone icon in the far right of the Chrome address bar, and should be able to proceed to calibrating the headset.

First time using Lexia English on an iPad
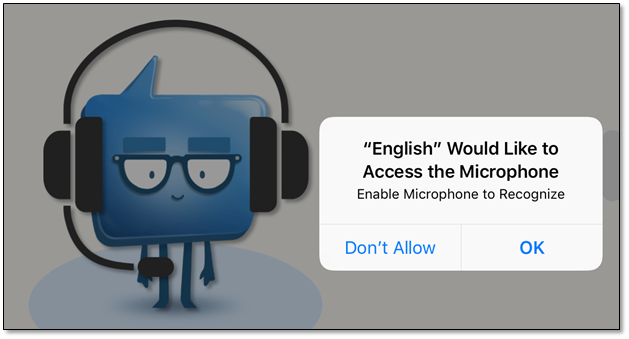
Explain to your students that the first time they launch Lexia English on an iPad, they should see a notification that “English would like to access the microphone. Enable microphone to recognize.” They should select “OK.”

After they select “OK,” they should be able to proceed to calibrating the headset.
If you aren’t sure whether access to the microphone was successful, go back to the iPad’s home screen, and select Settings > Privacy > Microphone and look for the app “English.” Make sure that the toggle is set to on (it should be green).


